Printfriendly

Showing posts with label homemade candy. Show all posts

White Chocolate Cherry Fudge!


As I have mentioned before, my husband loves anything cherry, so I figured this "White Chocolate Cherry Fudge" would be something he would like!!!   Boy or boy, was I right!  He loves this...allmost too much!!!   He can't stop eating it, but it is Christmas so I guess he can indulge for the next week or so!  

This is so easy and even I thought it was really good.  I am not a cherry lover like he is, but I do like maraschino cherries, because they are so sweet!   I also love anything white chocolate!!!  This is a quick and easy candy to make also!  It's just about fail proof if you follow the steps.

Here is what you will need:

2  (11 oz.) bags white chocolate chips or an equivalent of good white chocolate
1  (14 oz.) can sweetened condensed milk
1 tsp. vanilla
1 Tbs. butter
1 cup maraschino cherries, well drained and chopped
1 or 2 drops of red or pink food coloring


Place the white chocolate chips and the sweetened condensed milk in a heavy saucepan on the stove over medium heat.  Stir continuously until melted and smooth.    Use a good white chocolate chip for this and the results will be better.  I used Ghirardelli.  They just melt so smooth.

You can also do this in the microwave at 1 minute intervals, stirring after each minute.
Stir in 1 Tbs. butter until melted.  Add 1 tsp. vanilla. 


Stir in the drained, chopped cherries!   It's very important that the cherries be drained thoroughly.  Before chopping place them on about three layers of paper toweling to draw the moisture out.  If you don't do this, your fudge will be runny.  I do like to use the maraschino cherries though because they give the fudge a juicier bite.  You could use candied cherries if you prefer.


Line an 8"x 8" dish with parchment paper or nonstick foil.   Spray it with nonstick spray.  Pour the fudge in and smooth the top with a spatula.  Allow to sit at room temperature for 3-4 hours then cut into 1 inch pieces.


Place on a serving dish if serving immediately or in a tin or something with a tight lid for storing.  Store this in the fridge overnight when not serving!


It's really yummy!!! 
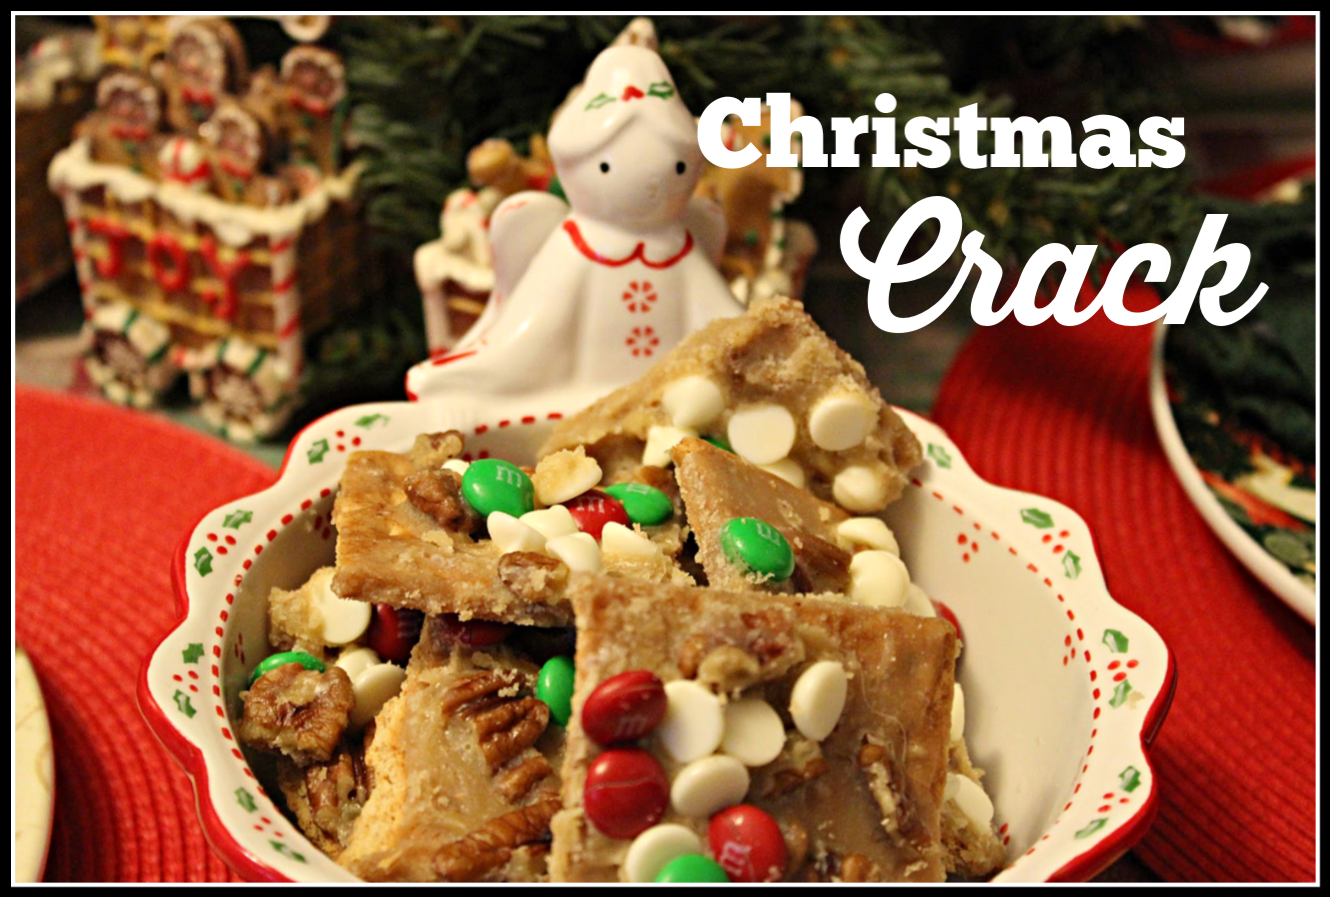
Christmas Crack!


I don't usually name any of my recipes anything with 'crack' in the name, just because the internet and Pinterest is full of crack this and crack that.  It's been highly overused.   However, this name just fits this to a tee, because of the highly addictive nature of it!!!  This is the second batch I have made already this season and I haven't even taken it to anyone yet!    It's also so easy you won't believe.

 Here is what you need:

14 cinnamon graham crackers
1 cup butter  (2 sticks)
1 cup brown sugar
1/4 tsp. salt
1 tsp vanilla
1 cup pecans or walnuts, chopped
1 cup white chocolate chips (you can use chocolate also)
1 cup M&M candies (optional)

Preheat oven to 350 degrees.

Line a large baking sheet with parchment or nonstick foil.  Lay the graham crackers end to end on the sheet.
 Place the butter, brown sugar and salt in a heavy saucepan.   Bring to a boil, stirring constantly.  Cook for 2 minutes.  Remove from heat and add the vanilla flavoring and nuts.    Pour evenly over the graham crackers.   Place in a 350 degree oven for 10 minutes.

Remove and sprinkle with the white chocolate chips and M&M's.   You can use whatever toppings you like here.  Mini chocolate chips are good or even crushed peppermints works for a little twist!!!   Cool in the refrigerator for a couple of hours, then break in pieces.   You can break this in irregular pieces or use a pizza cutter and cut along the broken lines of the crackers to make squares!!!  This is delicious and it disappears fast!!!  

Peppermint Bark!


This "Peppermint Bark" is one of my son's favorites during the holidays and I really like it also!!!  This is probably one of the easiest homemade candies you can make!!!  It's a great for gift giving!!!  Here is all you need:

1 lb. white candy coating, chopped
1 Tbs. butter
1 Tbs. vegetable or canola oil
1/2  tsp. peppermint oil
1 cup crushed hard peppermint candy ( you can use candy canes or hard candies)

Melt the bark in the microwave using 1 minute intervals and stirring after each minute.  When it's melted stir in the butter, oil and peppermint oil.   Add the crushed candy.

Cover a baking sheet with parchment paper or nonstick foil and pour the mixture over it evenly.  Refrigerate until firm, about two or three hours, then break into pieces.   Store in a airtight container.

Microwave Peanut Brittle!


I love good peanut brittle, but really good peanut brittle can be hard to find.   This "Microwave Peanut Brittle"  is so easy you won't believe it and it tastes amazing.  It's so much better than anything you can buy.  This would be perfect for gift giving and it is also not nearly as expensive to make as some of the other homemade candies can be.  Here is what you will need:


1 cup white sugar
1/2 cup light corn syrup
1/4 tsp. salt
1  1/2 cups unsalted peanuts
1 Tbs. butter
1 tsp. baking soda
1 tsp. vanilla

Place the sugar, corn syrup, and salt in a glass bowl and mix.  Microwave on high for 5 minutes.  Stir in the peanuts and the butter.  Put this back in the microwave for 4-5 minutes.  My microwave does this fine in 4 minutes.  If you have a lower wattage microwave, you might need to go 5 minutes.  The mixture should be bubbling and turning a caramel color.   Add the baking soda and the vanilla.  Stir until the foam is gone.  If the children are helping make this, be very careful at this stage, this is so hot it will burn you really bad if it gets on you! 

Immediately spread on a cookie sheet you have lined with either parchment paper sprayed with nonstick spray or nonstick foil.  I used nonstick Reynolds Wrap.   If you have read many of my recipe posts, you know I love the stuff...lol.   It's great for so many uses.   You have to spread this fast because it starts to set up.  Use a spatula, you have also sprayed with nonstick spray to spread this thin.   Let it sit out to dry and firm up for about 30 minutes. 


Break it into pieces and it's ready to dive into.  Store in an airtight container at room temperature and it keeps for several weeks, but it won't last that long!  You could place this in decorative tins for perfect little gifts! 


Ten Easy Candy Recipes...Perfect for Gift Giving!


This is a collection of ten of our easiest candies that are great for candy trays or for gift giving!  Sometimes a homemade gift of candy or other homemade treats means so much more than something you buy, because not everyone makes their own treats at Christmas or maybe they are not able to bake or cook anymore and homemade candies or cakes bring wonderful memories back for them! 

To view each recipe, click on the title below each picture and it will take you to that post! 


Old Fashioned Black Walnut Fudge!


There are so many various fudge recipes now it seems.  I have several different ones on my site, some so easy a child could make them and then some of the ones that are little more involved.   This is the old fashioned fudge that is the type my mother says they made back in the day.  Actually, it's the kind I remember Mama making when I was a little girl. 

This uses black walnuts, which is what folks used back then, because they grew abundantly on their farms or in their neighborhoods.   If you can't find black walnuts or don't care for them, you can use English walnuts or even pecans.   Here is what you will need for this:

3 cups white sugar
3 Tbs. cocoa powder
3  Tbs. butter
1 1/2 cups milk (whole milk, not 2%)
dash of salt
1 Tbs. vanilla
1 cup black walnuts

In a heavy saucepan combine the sugar, cocoa, butter, milk and salt and cook until it reaches soft ball stage.  That is 240 degrees Fahrenheit or 116 degrees Celsius.   You can also drop some in cold water and if it forms a ball, it's to that stage. 

Take my advice, if you are making candy much, invest in a candy thermometer, because guessing does not work when it has to reach a certain temperature to work.  

Remove from heat and add the vanilla.  Beat until creamy.  Stir in the nuts.  Pour into a buttered 8"x8" dish and allow to cool.  Cut into squares. 

Two Candy Making Tips

1. Use pure cane sugar when making candy.  It will take the high temperatures needed to make candy better and won't burn.  Some cheaper sugar is actually made from beets.  Pure cane sugar says it's pure cane on the bag.
 
2.  You need to stir this and most candy while it cooks and gets to the soft ball stage or whatever stage it calls for, but do not scrape the side of the pan when you stir.  It causes the fudge to crystallize and it won't be good. Stir carefully. When you pour it up into the pan, don't scrape down the sides of the pan either. That's where crystals form and you don't want them in your finished product. 


Old Fashioned Potato Candy!


If you have never had this "Old Fashioned Potato Candy", you have really missed out.  It's called potato candy, because it's made with mashed potatoes.  Makes sense doesn't it?  It might sound weird if you have never tried it, but believe me, it works.   We make another version of this with cream cheese also, but you can hardly tell the difference.  I am sure when this was originally made, they didn't have the availability of cream cheese like we do today. The starch in the potatoes is what makes this work.  It doesn't taste at all like potatoes though. 

 Here is what you will need for this:

1/4 cup mashed potatoes
2 Tbs. butter, room temperature (no substitutions)
2 Tbs. milk
1 tsp. vanilla
pinch of salt
1lb. confectioner's sugar
1/3 cup peanut butter

Combine mashed potatoes, butter, milk, vanilla and salt.

Gradually mix in the powdered sugar until a dough forms.  Chill the dough for 1 hour.

Sprinkle about 1 Tbs. confectioners sugar onto wax paper or a large cutting board and roll the dough out into a large rectangle.

Spread the peanut butter out in a thin layer to cover all of the dough.  This might take just a bit more than 1/3 cup depending on how large your rolled your rectangle.

Roll it up like you would a jelly roll.  Wrap it up tight in plastic wrap and chill in the refrigerator at least 2 hours before slicing into pieces to serve.   Keep in an airtight container and in the refrigerator when not serving to keep it from drying out.


This is really pretty on candy or dessert trays!


White Chocolate Oreo Truffles!


I love the Oreos dipped in white chocolate, which is precisely why I don't buy them very often!  These Oreo Truffles are even better than those, because you add cream cheese to the mix and you all know I love cream cheese.

 One of our Sweet Tea and Cornbread friends wrote to me and said she had been trying to get her daughter in the kitchen with her more so that she could learn to cook.  She said she never thought about it before she starting reading my posts and I seemed to think it was so important. 

 I was thrilled somebody read it and actually took my advice...lol!   I got a good laugh from her message also.   She said her daughter reads the recipes and gets all of the ingredients out for them to cook and one day her daughter suddenly said, "I don't know who this Sweet Tea and Cornbread woman is, Mama, but she sure does love her some cream cheese"!    

Truer words were never spoken, concerning me and cream cheese...lol.  I thought it was so cute! 

These are easy as can be to make and the results are scrumptious!  Perfect for gift giving also!  Here is what you will need:

1 (14.3 oz.) bag of Oreo cookies
1 (8 oz.) cream cheese, softened to room temperature
1 (12 oz.) bag of white chocolate chips
1 Tbs. shortening

Place Oreos in a food processor and pulse until fine crumbs.  Cut the cream cheese in chunks and add to the processor bowl and process until mixed in.   You will probably need to mix it a bit more with a spoon to get it all incorporated. 

Scoop with a small ice cream scoop or cookie scoop onto a tray lined with parchment paper.  Freeze for about an hour. 

Place the white chocolate chips in a clean dry glass bowl along with the shortening and microwave for about 2 minutes, stirring after 1 minute or until melted.  Stir together to mix in the shortening.  

Dip the frozen Oreo balls in the melted white chocolate and place on parchment paper.  Allow to harden. 


 Store in an airtight container in the refrigerator until ready to serve. 


White Chocolate Fudge...It's Easy Peasy!


This delicious "White Chocolate Fudge" is one of my easy peasy recipes that anyone can make with success.  When it comes to homemade candy that's a good thing, because it's not all fool proof.  Here is what you will need for this fudge:


1  (12 oz.) bag of white chocolate chips
1 (8 oz.) block of cream cheese, softened to room temperature (do not use light or fat free)
3  1/2 cups powdered sugar
1 tsp. vanilla
1 cup chopped pecans or walnuts

Melt the white chips in the microwave or in a double boiler on the stove.   Mix with the room temperature cream cheese until smooth.  Gradually stir in the powdered sugar and vanilla until combined.  Fold in the nuts.  You can leave the nuts out for those who might have allergies or don't care for them.  The mixture will be thick.

Pour into an 8"x8" baking dish or pan that has been lined with buttered parchment paper, wax paper or nonstick foil.   Place in the refrigerator and chill for 2-3 hours.   Turn it out on a cutting board, remove paper or foil and cut in small squares. 


This is rich, so smaller pieces are good.


This white fudge is a really pretty contrast to the chocolate candies on a candy or dessert tray!


FOLLOW ME HERE ON FACEBOOK FOR DAILY POSTS:

Follow Me on Pinterest